 SECTIONS
On the enhanced Plan Detail page you can view a Plan Details panel showing summary information about the plan, and a Product panel (with a collapsible Totals banner) where you can add, edit and delete products on the plan. When you make changes to the plan, the totals update to reflect the changes.
If you want to expand or collapse the Plan Details panel, click  or
or  depending on whether you want to expand or collapse it.
Custom Buttons
Custom buttons are supported in the button bar. You might need to click the  icon to access buttons that cannot fit in the current window size.
Custom buttons to invoke Visualforce pages must be implemented using the workaround described in
Price Books
If your products belong to active Salesforce Price Books, you can apply a price book to plan line items when you create them. For information about price books, see the "Prices and Price Books" topics in the Salesforce Help.
Resetting the Layout
To switch to the Salesforce version of a detail page:
- Click the settings icon
 .
. - Click Switch to Salesforce Detail Page.
If you've made changes to the layout of the page and want to restore the default layout:
- Click the settings icon .
- Click Reset Layout in the Columns section.
Changing the Layout
To change the layout of the plan lines on the Plan Detail page you can:
- Filter by a value in particular field.
- Move columns.
- Sort by column.
- Show or hide columns.
Filtering
To filter the lines by a particular value in a column:
- Hover over the column heading you want to filter.
- Click the
 icon.
icon. - Hover over Filters.
- Do one of the following depending on the type of information in the column:
- Click the required values.
 is displayed alongside selected values.
 - If the values in the column are numeric, enter values in the less than (<), greater than (>), and equals (=) fields to define a range.
- If the column contains dates, hover over Before, After or On, and then select a date. To filter on a date range, enter After and Before dates.
- Click the required values.
A is displayed next to Filters when the column has active filters.
To clear all filters for a column, click Filters. The  is removed from the column. To clear an individual filter, click the relevant value. The is removed from the selected value.
The typeface of column headings to which you've applied filters changes to bold italic to indicate that a filter is applied to that column.
Moving Columns
To move a column:
- Drag the heading of the column that you want to move.
- Drop the column at the position you want. Two vertical arrows appear where you can drop the column:
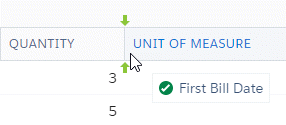
Sorting by Column
To the sort the plans by column, do one of the following:
- Click the column that you want to sort on. The up arrow
 indicates that the plans are sorted in ascending order. The down arrow
  indicates that the plans are sorted in descending order.
 - Hover over the column that you want to sort on, click the icon then select
 Sort Ascending or
  Sort Descending depending on whether you want to sort the plans in ascending or descending order.
Showing and Hiding Columns
To show or hide columns:
- Hover over a column heading.
- Click the icon.
- Select Columns.
- Select the checkboxes of the columns you want to display and clear the checkboxes of the columns you want to hide.