 SECTIONS
Sample Flow to Apply Service Credit via a Screen Flow
This page describes a sample flow to add a service credit to an active billing contract by entering credit information via a screen.
This sample flow does not include error handling. For an illustration of how to build error handling into a flow, see either of the sample flows for renewing contracts at Sample Flows to Renew Contracts.
Prerequisites
This sample flow has the following prerequisites:
- In the Flow Builder, go to the Toolbox and create a variable of Data Type = Text to store the ID of the active contract that a service credit line will be added to.
Name this variable
recordId. Select the Available for input checkbox.
- In the Flow Builder, go to the Toolbox and create a variable of Data Type = Text to store the ID of the change request that is created to add the service credit line to the active contract.
Name this variable
ChangeRequestId.
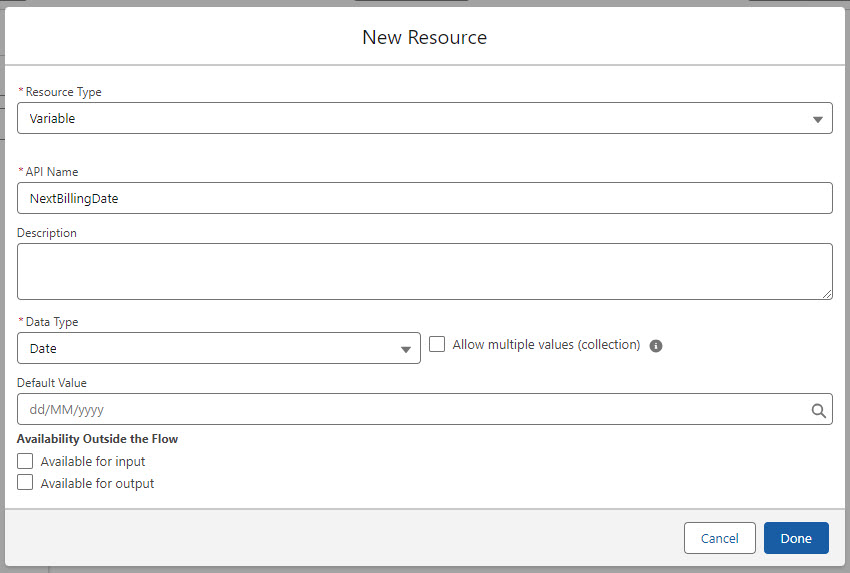
- In the Flow Builder, go to the Toolbox and create a variable of Data Type = Date to store the date that Billing Central calculates to be the contract's next billing date.
Name this variable
NextBillingDate.
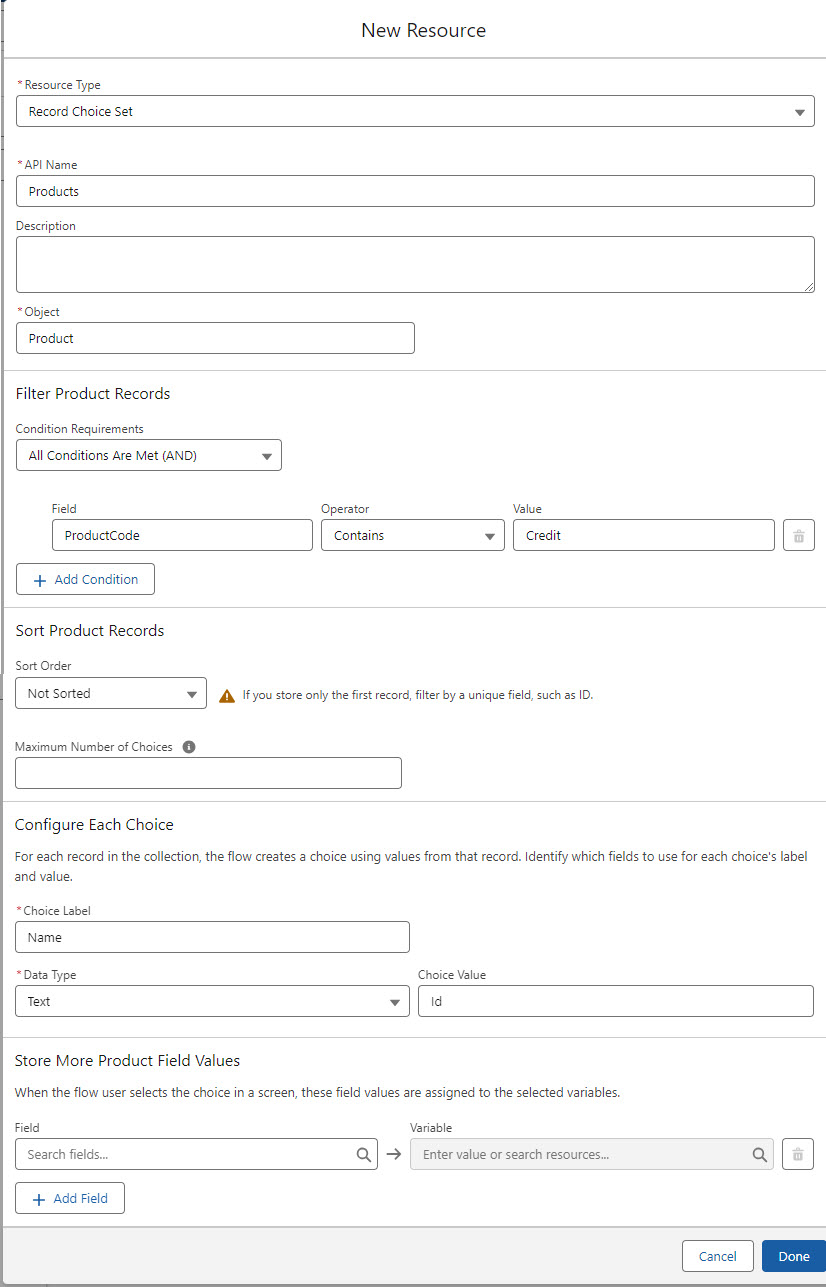
- In the Flow Builder, go to the Toolbox and create a new resource of Resource Type = Record Choice Set. Name this resource
Productsthen complete the following values:
Object: Product
Filter Product Records, Condition Requirements: All conditions are met (AND)
Then add the following condition:ProductCode contains Credit
Configure Each Choice
Choice Label: Product Name
Data Type: Text
Choice Value: Product ID


The Sample Flow
This sample flow is a Screen Flow where the user enters a contract's service credit information via a screen. Billing Central then creates a change request for the service credit line, calculates the next billing date for the service credit line, then applies the change request to the active contract.
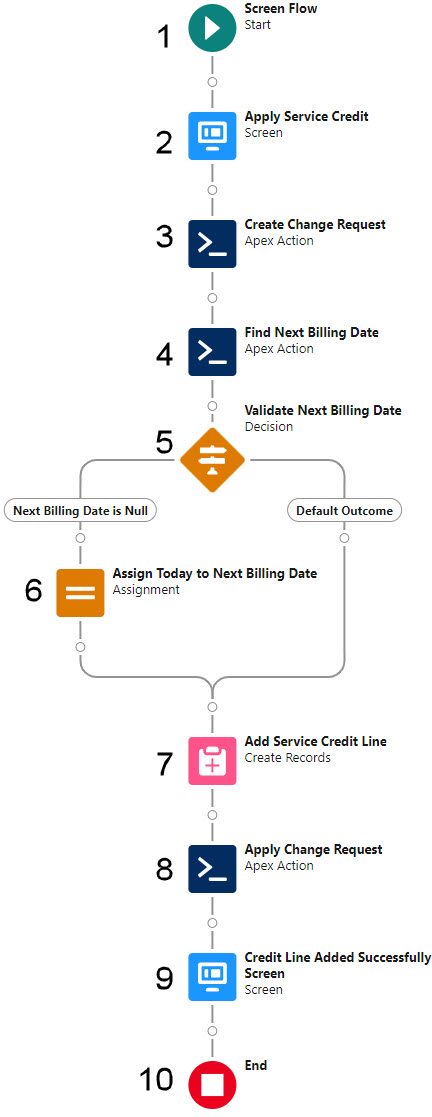
An explanation of each numbered item is provided in the table below.
| # | Flow Element | Sample Flow Suggestion | Sample Flow Setup | ||||||||||||||||||||||||
|---|---|---|---|---|---|---|---|---|---|---|---|---|---|---|---|---|---|---|---|---|---|---|---|---|---|---|---|
| 1 |

|
Create a new Screen Flow. | |||||||||||||||||||||||||
| 2 |

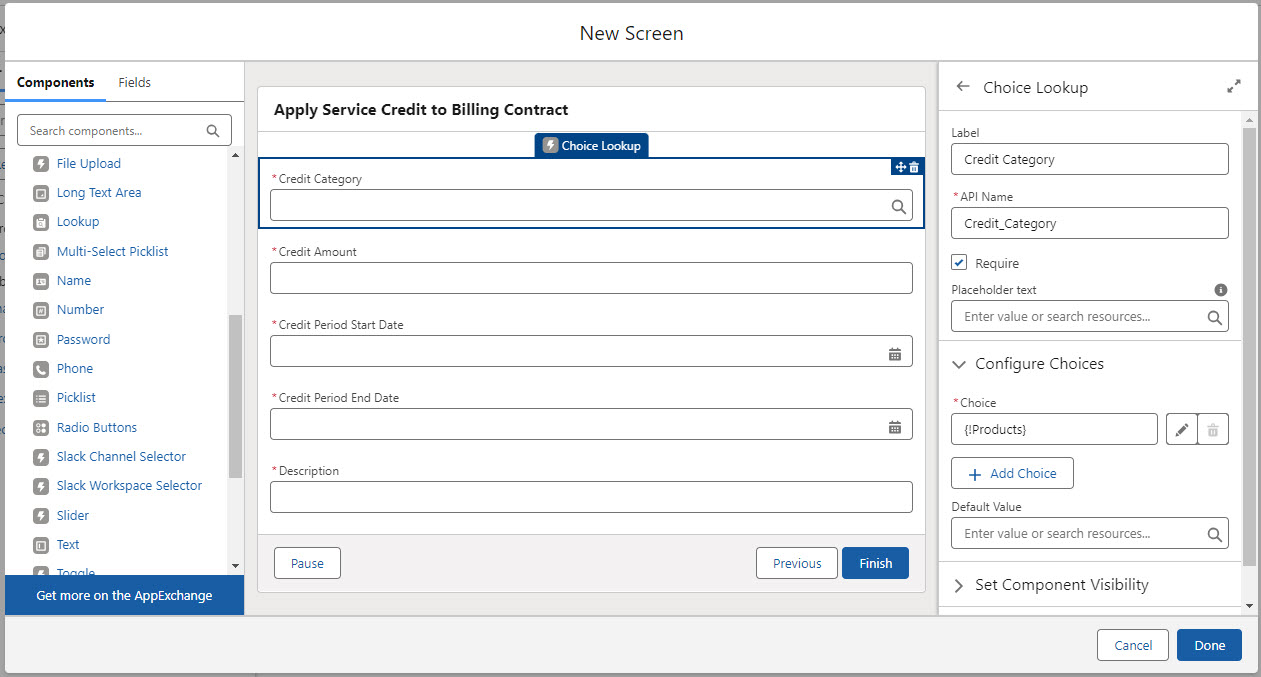
|
Add a Screen element and enter a label such as Apply Service Credit. Add the following components to the screen:
|
|
||||||||||||||||||||||||
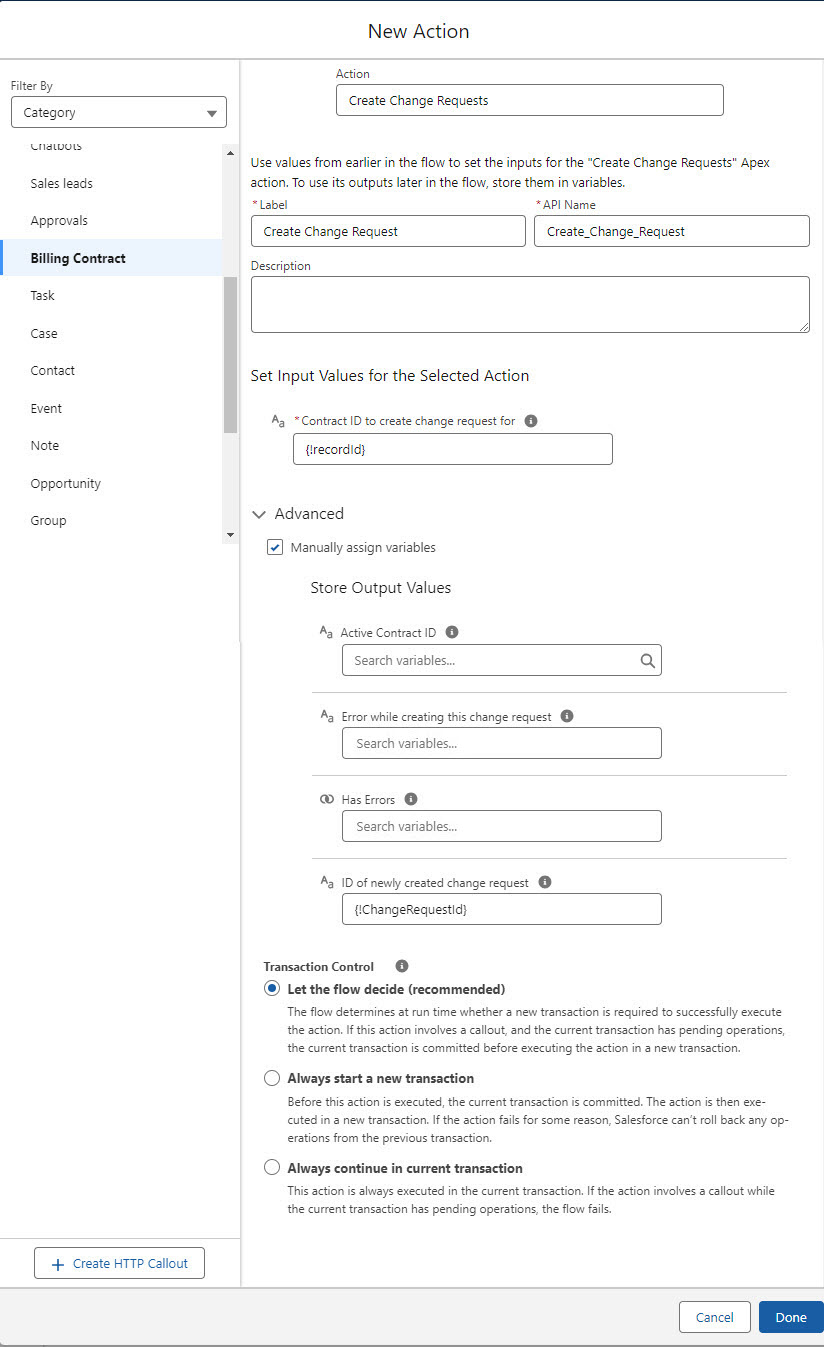
| 3 |

|
Add an Action element. Choose the Create Change Requests action, then complete the input and output values. Set Input Values Contract ID to create change request for: Store Output Values - assign this to the variable you created in "Prerequisites" step 2. ID of newly created change request: |
|
||||||||||||||||||||||||
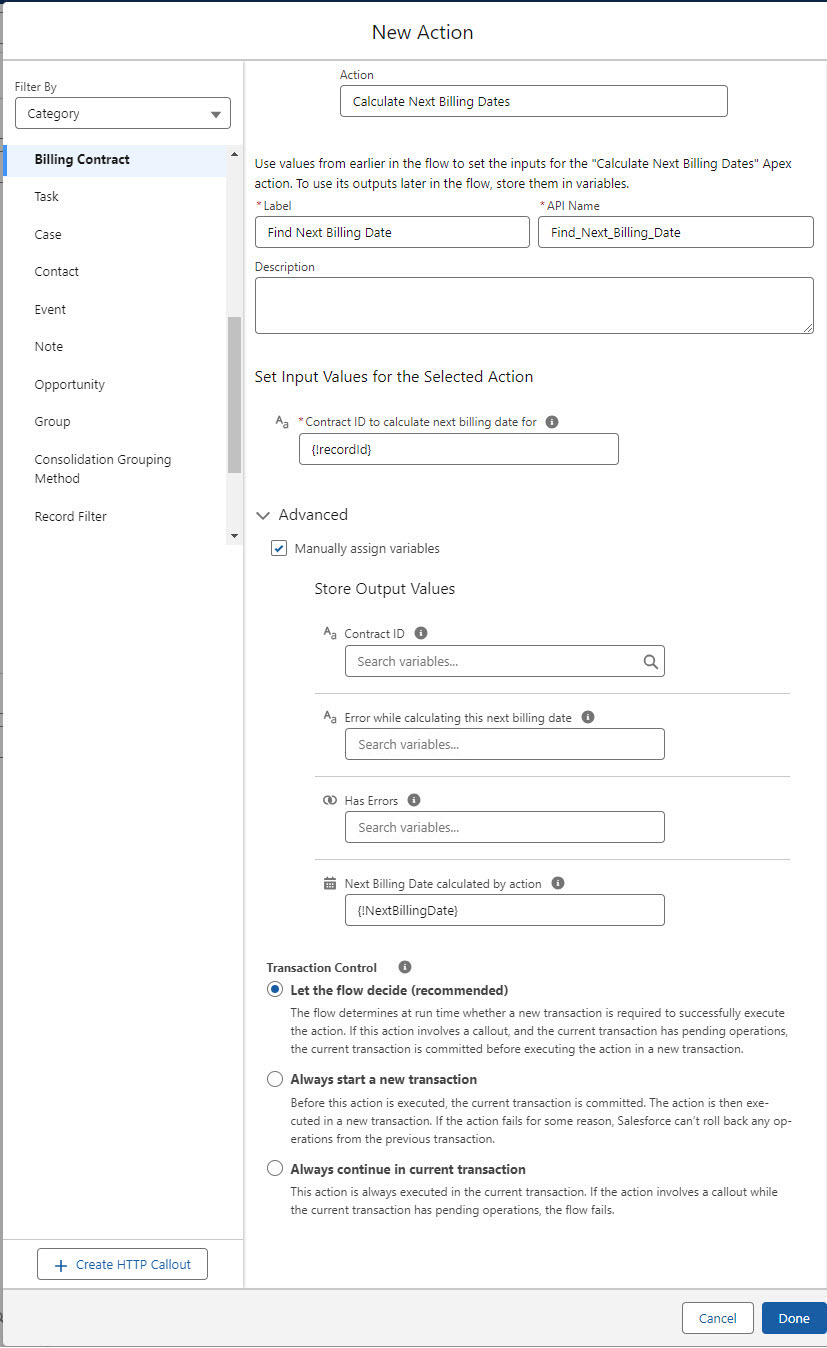
| 4 |
|
Add an Action element. Choose the Calculate Next Billing Dates action, then complete the input and output values. Set Input Values Contract ID to calculate next billing date for: Store Output Values - assign this to the variable you created in "Prerequisites" step 3. Next Billing Date calculated by action: |
|
||||||||||||||||||||||||
| 5 |

|
Add a Decision element to validate whether the Next Billing Date returned by the Apex action is null.
Create a Next Billing Date is Null outcome and set the condition to:
|
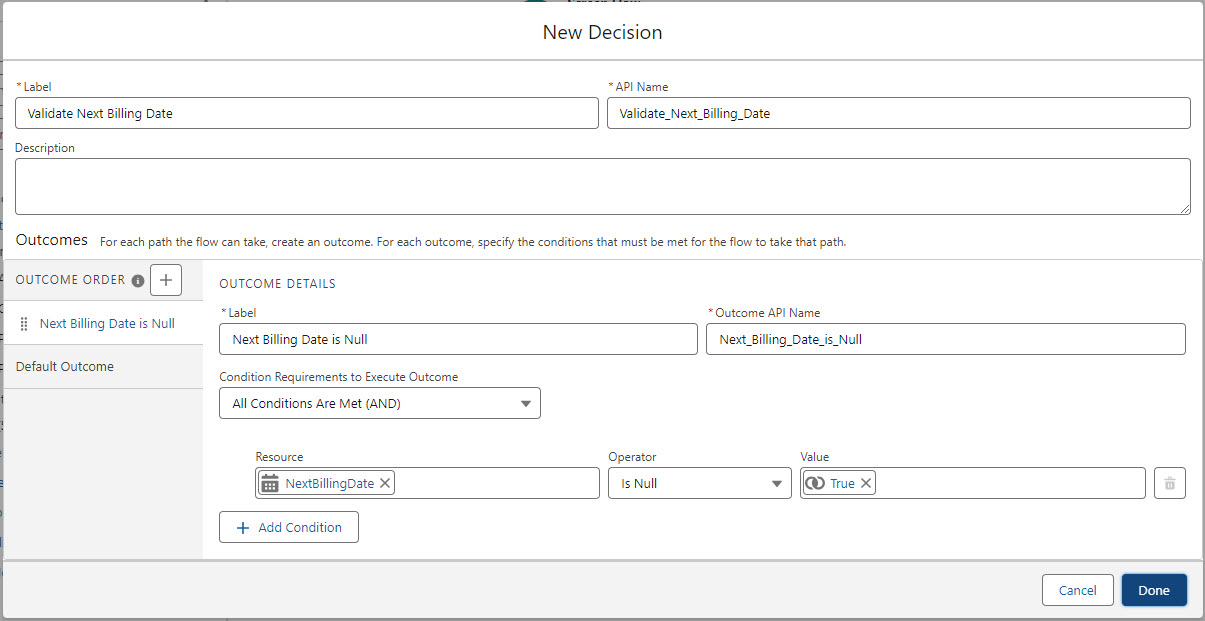
|
||||||||||||||||||||||||
| 6 |

|
For the Next Billing Date is Null outcome, add an Assignment element and set the following assignment: |
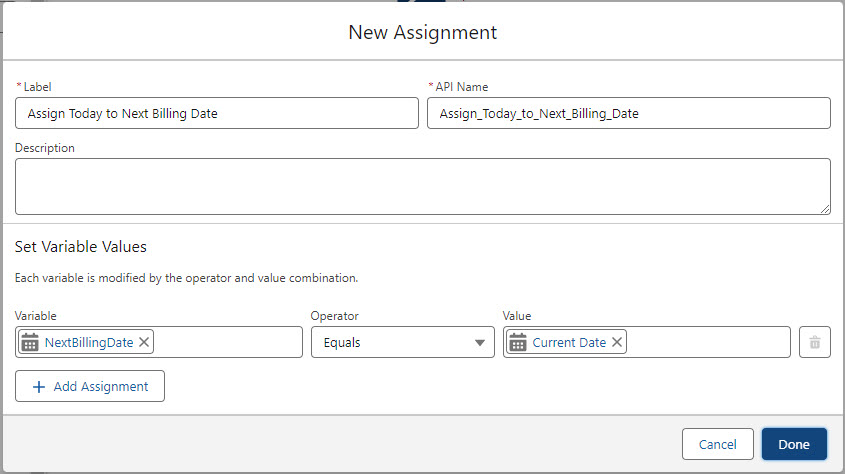
|
||||||||||||||||||||||||
| 7 |

|
Add a Create Records element and complete the window as follows: How Many Records to Create: One How to Set the Record Fields: Use separate resources, and literal values Object: Billing Contract Line Item Set Field Values for the Billing Contract Line Item
|

|
||||||||||||||||||||||||
| 8 |
|
Add an Action element. Choose the Apply Change Requests action, then complete the input and output values. Set Input Values Change Request ID to be applied: |
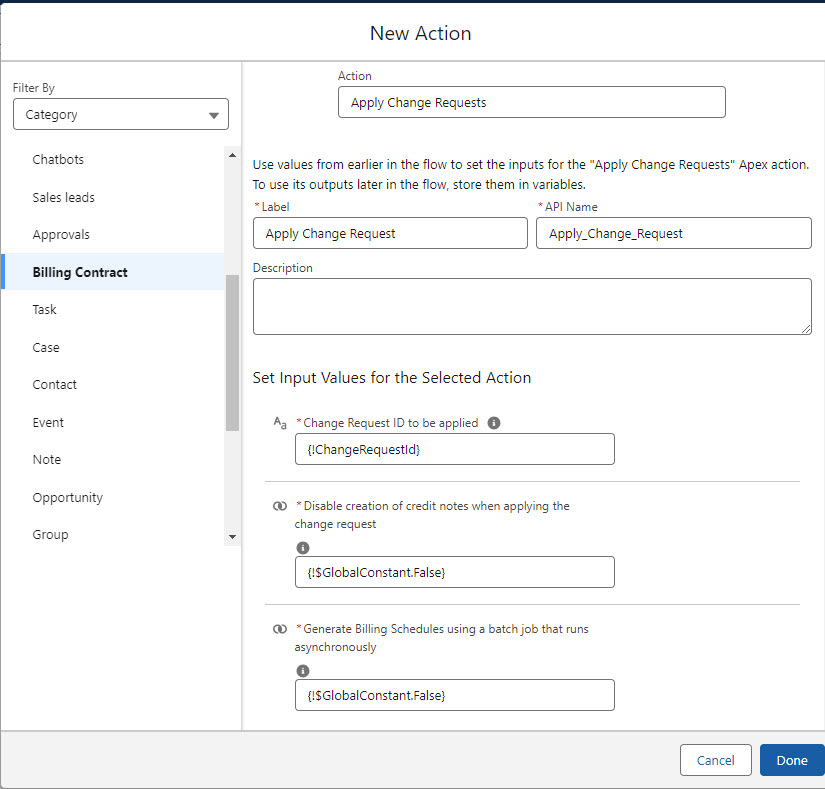
|
||||||||||||||||||||||||
| 9 |
|
Add a Screen element. Enter a label for the screen: Credit Line Added Successfully Add a Display Text component with the wording: Credit line added successfully. |
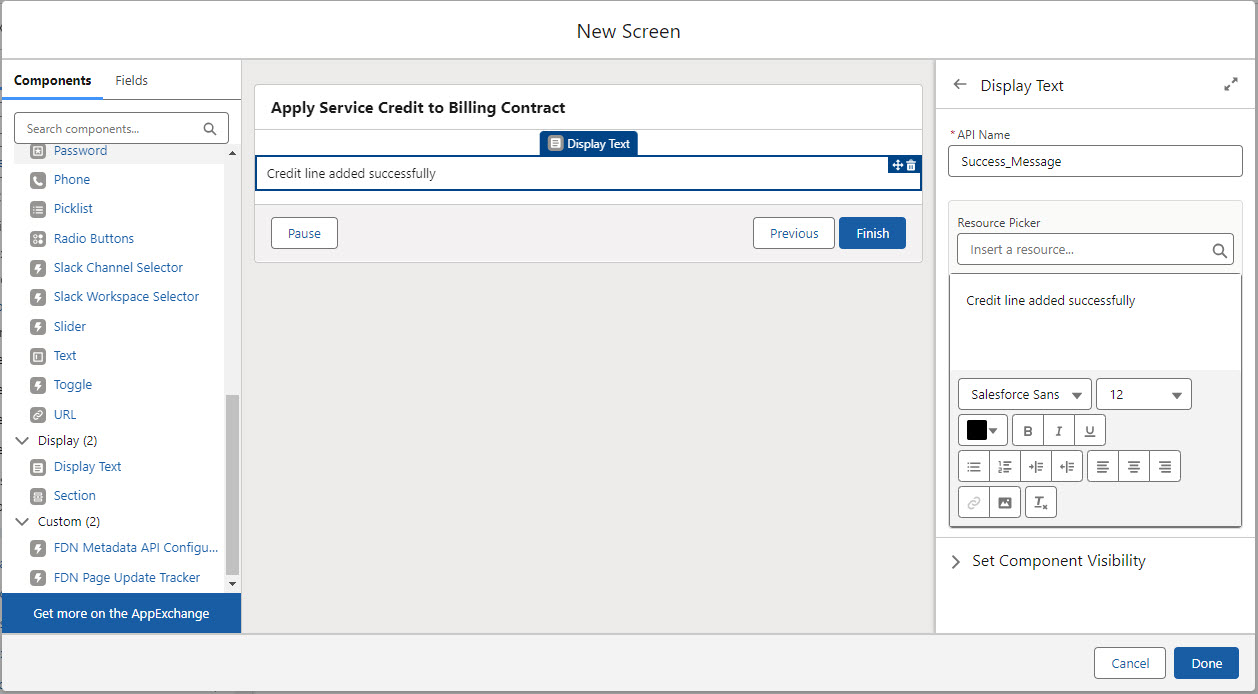
|
||||||||||||||||||||||||
| 10 |

|
End of flow. | |||||||||||||||||||||||||
| Activate the flow | Remember to save and activate the flow to make it available for use. | ||||||||||||||||||||||||||
|
Link the screen flow to a new button on the billing contract header so that users can click it to invoke the flow. |
To add a button for users to invoke the flow from a billing contract's detail page:
Now add the action to the billing contract Lightning record page:
If you do not use the Contract Lightning Page, you will need to add the action to your billing contract page layouts. |