 SECTIONS
Sample Flow to Apply Service Credit via a Record-Triggered Flow
This page describes a sample flow to apply a service credit to an active billing contract by editing two custom fields on the contract header. The two custom fields are a number to hold the credit amount, and a checkbox to indicate that the credit amount should be applied. The flow is triggered when this checkbox is selected on a billing contract's record page, or in the list view. By editing the custom fields in the list view and saving your changes, you can apply service credits to multiple billing contracts at once.
This sample flow does not include error handling. For an illustration of how to build error handling into a flow, see either of the sample flows for renewing contracts at Sample Flows to Renew Contracts.
Prerequisites
This sample flow has the following prerequisites:
-
On the Billing Contract object, create the following custom fields.
Label API Name Data Type Apply Service Credit Apply_Service_Credit__c Checkbox Credit Value Credit_Value__c Number - In the Flow Builder, go to the Toolbox and create a variable of Data Type = Text to store the ID of the change request that is created to add the service credit line to the active contract.
Name this variable
ChangeRequestId.
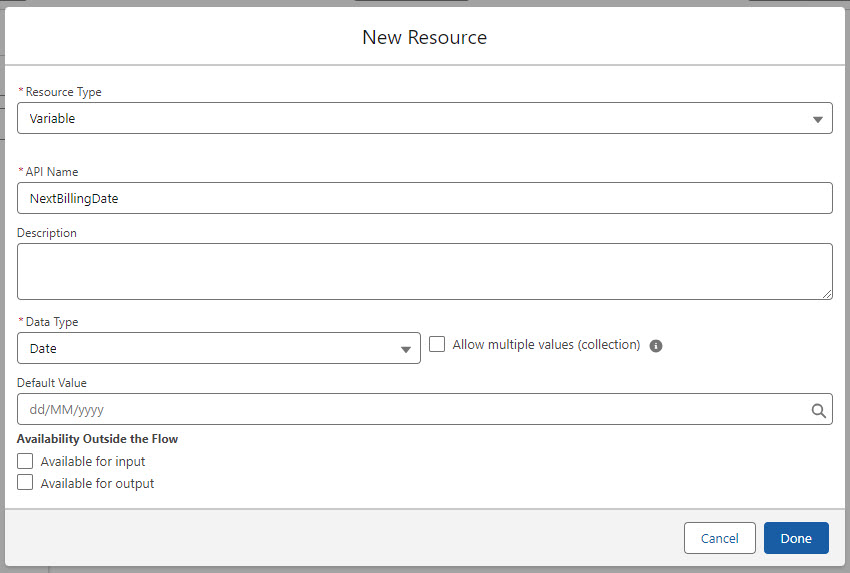
- In the Flow Builder, go to the Toolbox and create a variable of Data Type = Date to store the date that Billing Central calculates to be the contract's next billing date.
Name this variable
NextBillingDate.

The Sample Flow
This sample flow is a Record-Triggered Flow that requires the user to enter a service credit value in the Credit_Value__c custom field on an active billing contract, and to then select the Apply_Service_Credit__c checkbox. (See "Prerequisites" step 1 for details of creating these custom fields.) Billing Central then creates a change request to add a service credit line to the contract, calculates the next billing date for the service credit line, and applies the change request to the contract.
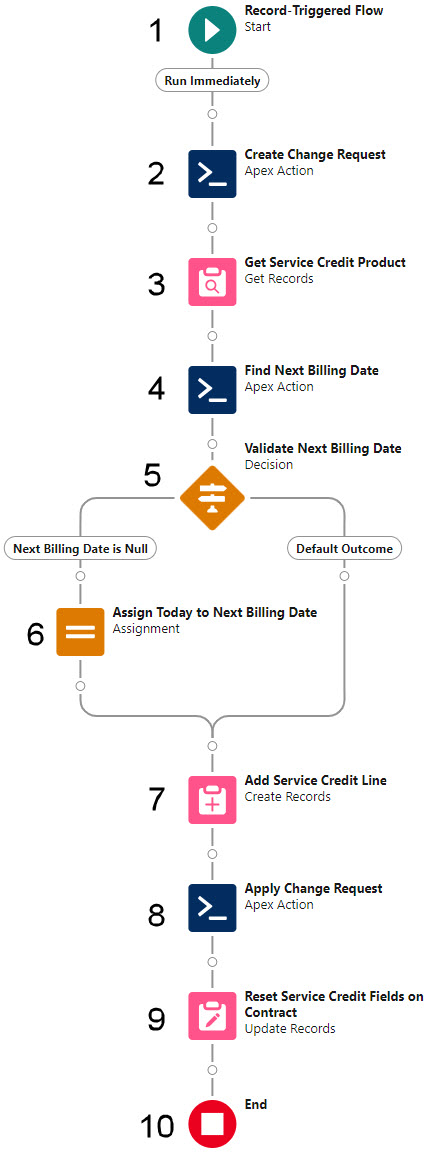
An explanation of each numbered item is provided in the table below.
| # | Flow Element | Sample Flow Suggestion | Sample Flow Setup | ||||||||||||||||||||
|---|---|---|---|---|---|---|---|---|---|---|---|---|---|---|---|---|---|---|---|---|---|---|---|
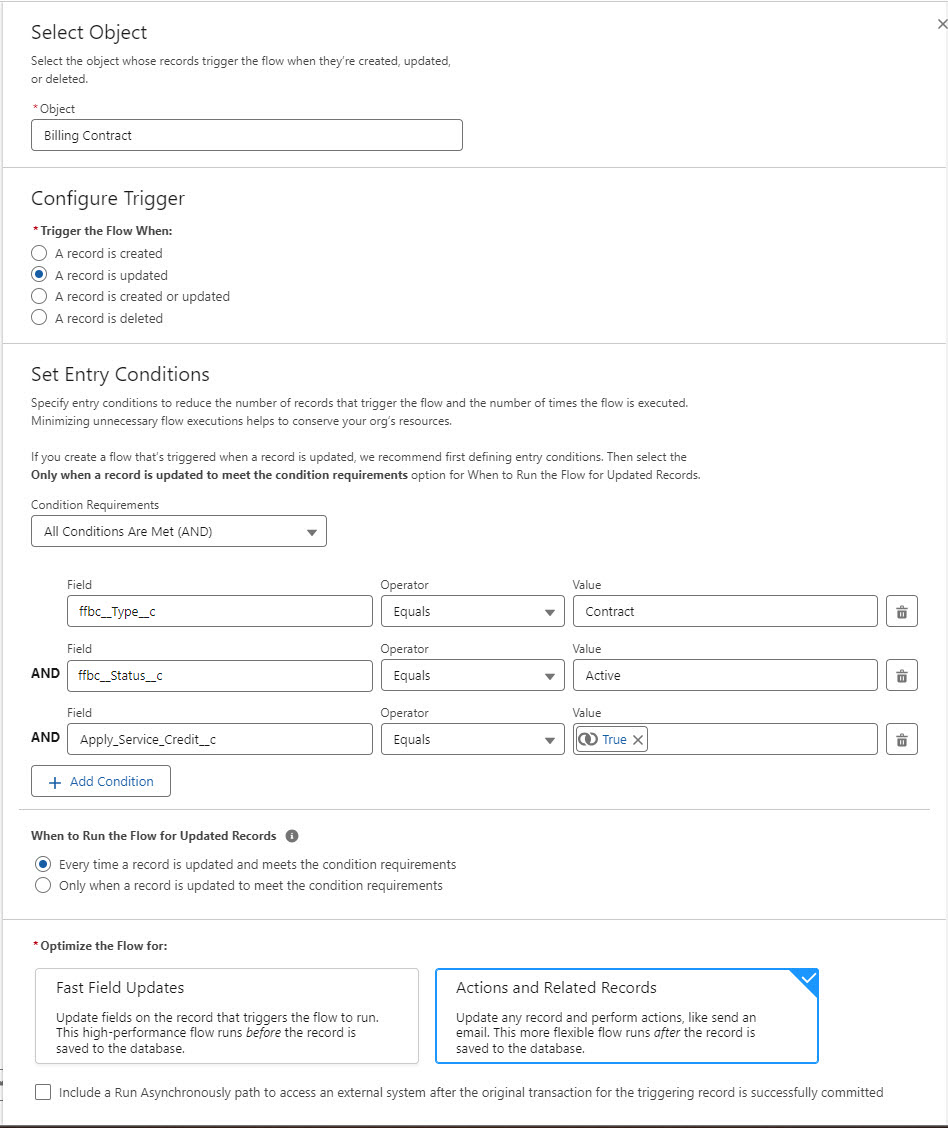
| 1 |

|
Create a new Record-Triggered Flow. In the window that appears, set: Object: Billing Contract Trigger the Flow When: A record is updated Condition requirements: All conditions are met (AND) Then add the following conditions:
When to Run the Flow for Updated Records: Every time a record is updated and meets the condition requirements |
|
||||||||||||||||||||
| 2 |
|
Add an Action element. Choose the Create Change Requests action, then complete the input and output values. Set Input Values Contract ID to create change request for: Store Output Values - assign this to the variable you created in "Prerequisites" step 2. ID of newly created change request: |
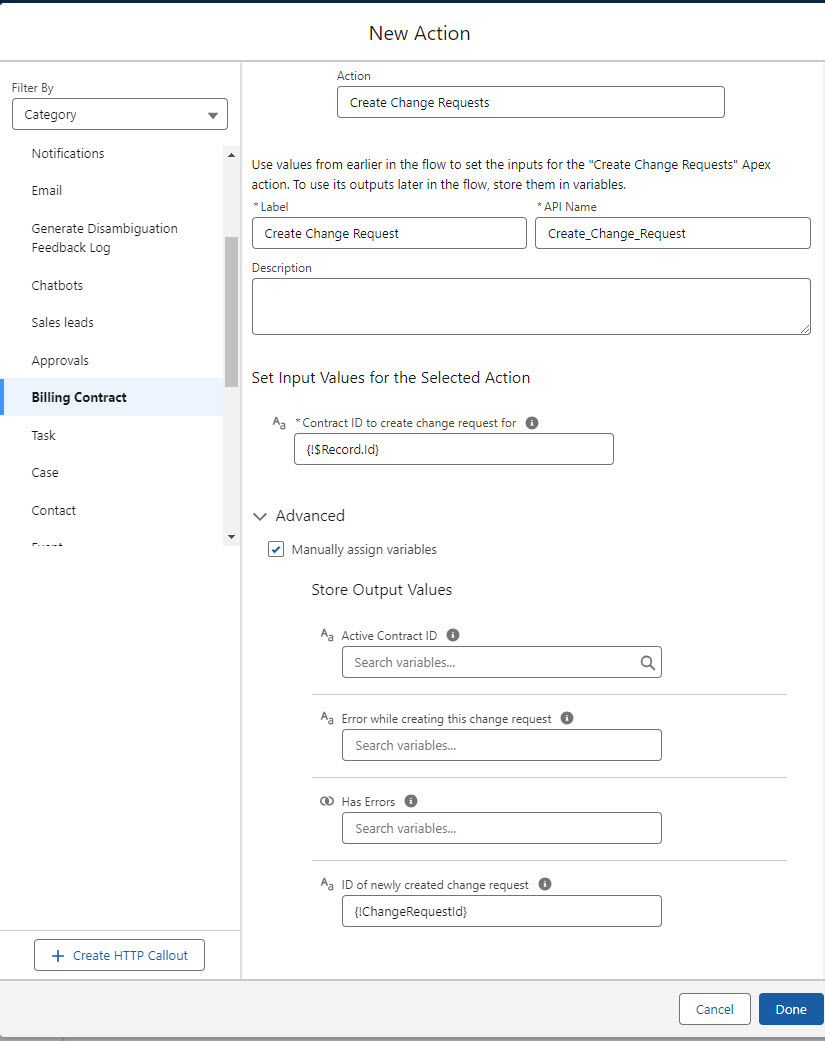
|
||||||||||||||||||||
| 3 |

|
Add a Get Records element. In the Get Records window, set: Object: Product Condition requirements: All conditions are met (AND) Then add the following condition:
How Many Records to Store: Only the first record How to Store Record Data: Choose fields and let Salesforce do the rest Select Product Fields to Store in Variable: ID |
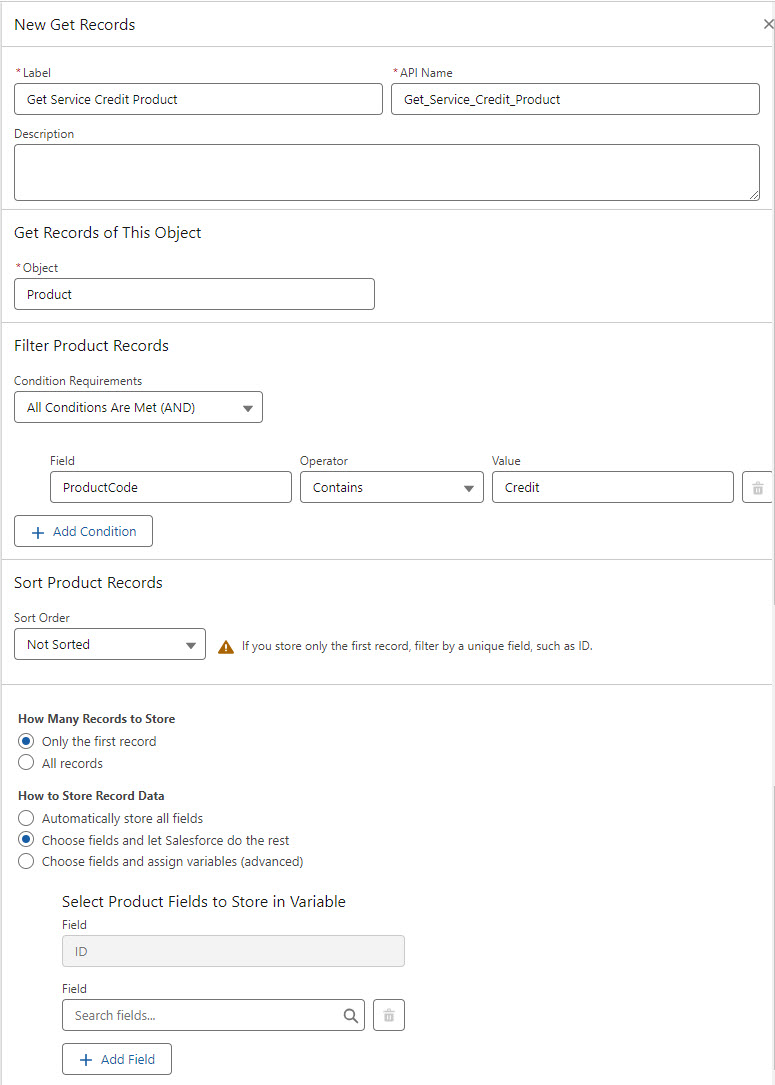
|
||||||||||||||||||||
| 4 |
|
Add an Action element. Choose the Calculate Next Billing Dates action, then complete the input and output values. Set Input Values Contract ID to calculate next billing date for: Store Output Values - assign this to the variable you created in "Prerequisites" step 3. Next Billing Date calculated by action: |
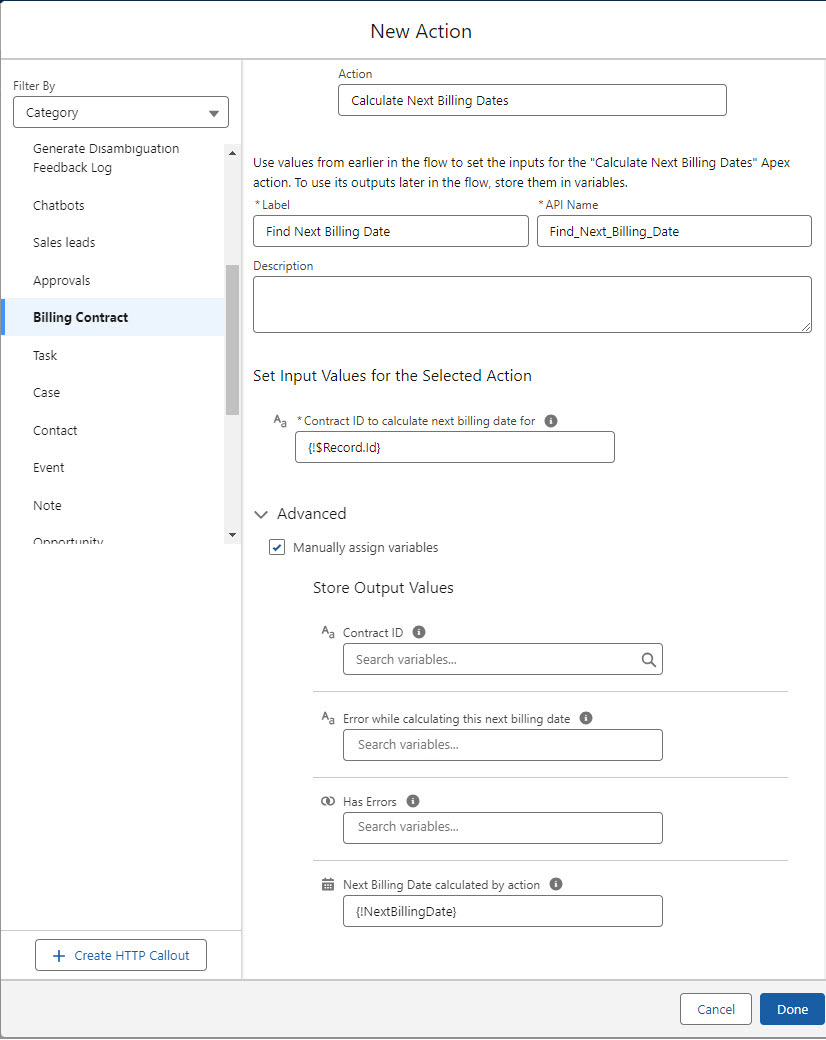
|
||||||||||||||||||||
| 5 |

|
Add a Decision element to validate whether the Next Billing Date returned by the Apex action is null. Create a Next Billing Date is Null outcome and set the condition to:
|
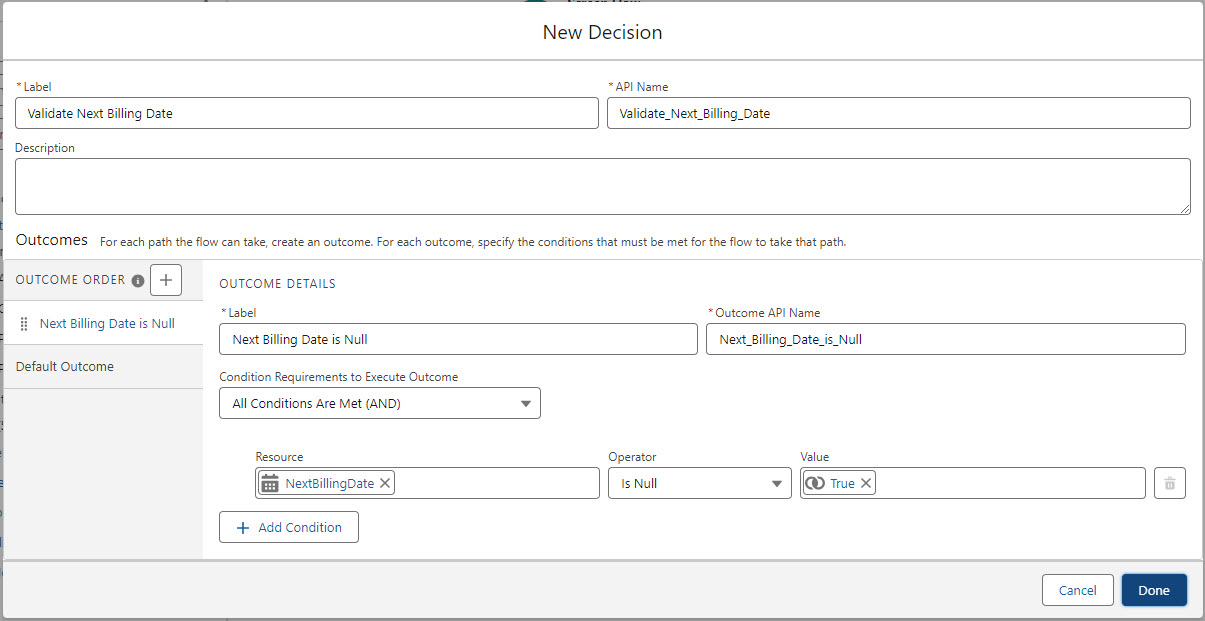
|
||||||||||||||||||||
| 6 |

|
For the Next Billing Date is Null outcome, add an Assignment element and set the following assignment: |
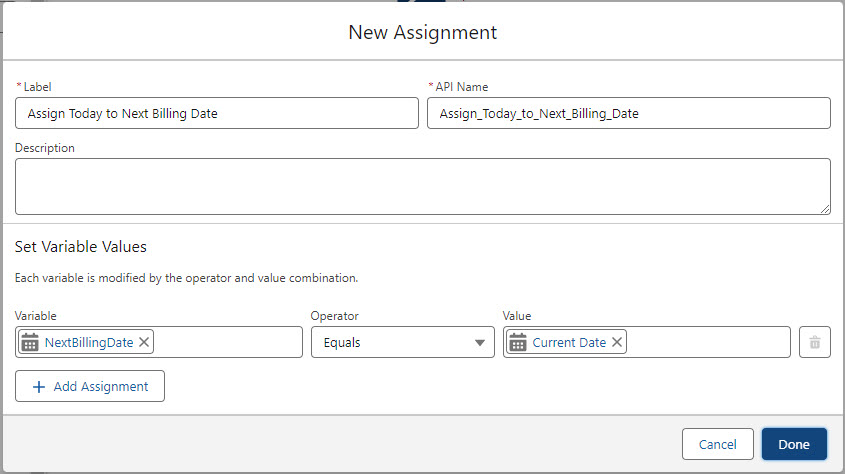
|
||||||||||||||||||||
| 7 |

|
Add a Create Records element and complete the window as follows: How Many Records to Create: One How to Set the Record Fields: Use separate resources, and literal values Object: Billing Contract Line Item Set Field Values for the Billing Contract Line Item
|
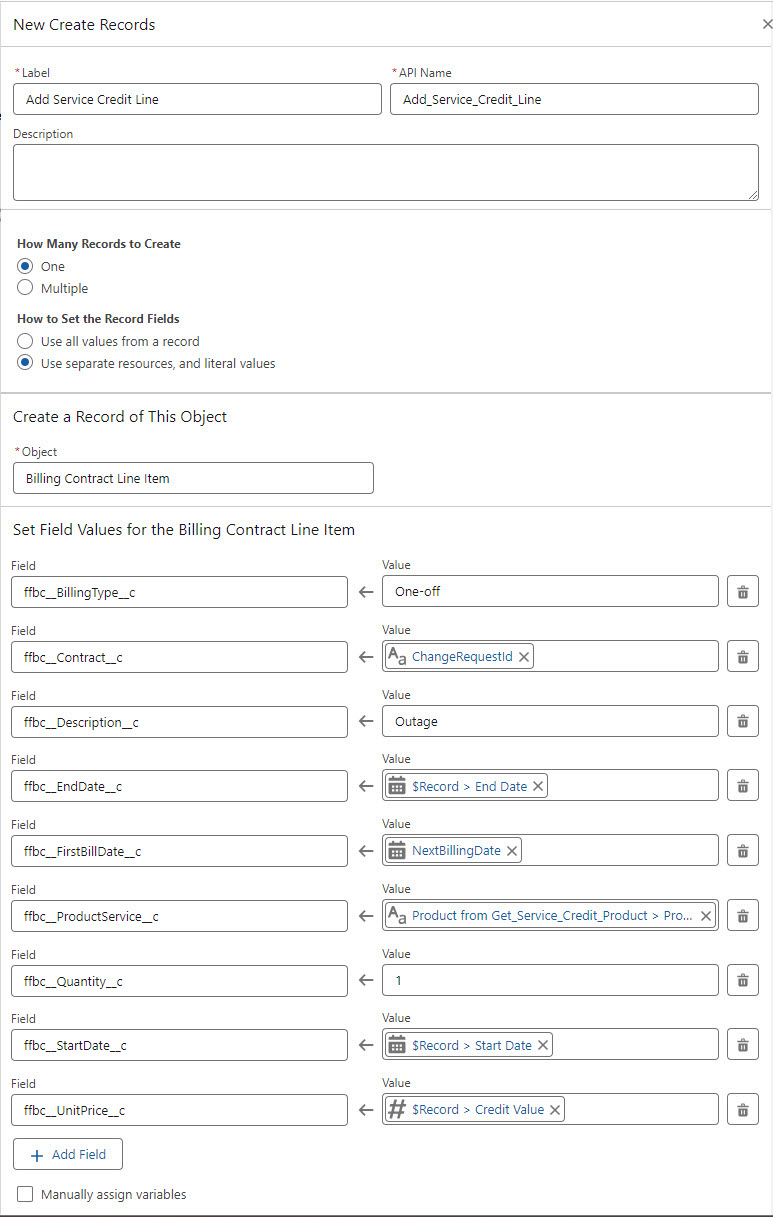
|
||||||||||||||||||||
| 8 |
|
Add an Action element. Choose the Apply Change Requests action, then complete the input and output values. Set Input Values Change Request ID to be applied: |
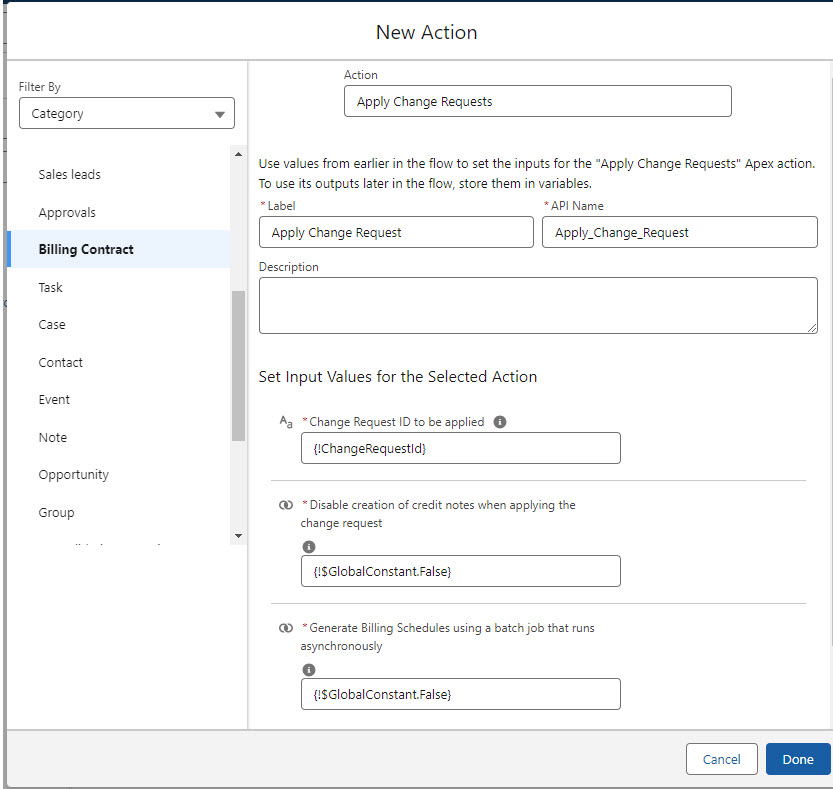
|
||||||||||||||||||||
| 9 |

|
Add an Update Records element and complete the window as follows: How to Find Records to Update and Set Their Values: Use the billing contract record that triggered the flow Condition Requirements to Update Record: None - Always Update Record Set Field Values for the Billing Contract Record
|
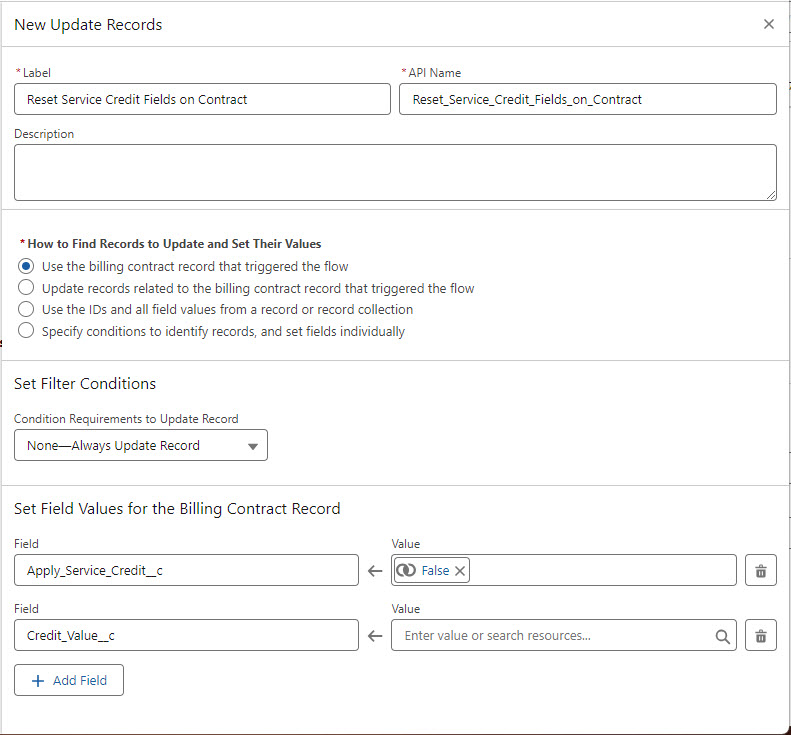
|
||||||||||||||||||||
| 10 |

|
End of flow. | |||||||||||||||||||||
| Activate the flow | Remember to save and activate the flow to make it available for use. |