 SECTIONS
You can navigate between FinancialForce applications and pages, and select various options, using the same standard text and button links used in Salesforce. On individual pages, you can also edit or update information using standard text fields, drop-down lists, and popup menus. See the Salesforce Help for more information.
Navigating Between Applications
To activate an application, switch between them, or return to Salesforce, select the appropriate option from the application selection box at the top-right of the page.
Navigating using Salesforce Lightning
Salesforce Lightning is an app based user interface that provides a modern and intuitive experience.
For more information about navigating using Salesforce Lightning see Salesforce Trailhead for learning modules and Salesforce Help.
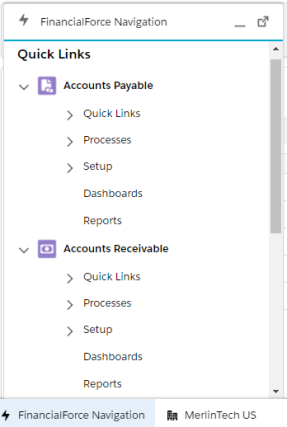
Global navigation using the Utility Bar
The global navigation menu is available as a component on the utility bar when working in Salesforce Lightning. The global navigation contains menu items that link to the most common tasks across all FinancialForce app.
The utility bar is always available at the bottom of the page when you are using an App that provides visibility. The global navigation is visible as standard when using the following FinancialForce Accounting apps:
- Accounting
- Billing
An Administrator can add global navigation to any custom App. For more information, see Setting up Navigation Components.
Visibility of the FinancialForce Accounting apps is determined by the Profile or Permission Sets assigned to the user. For more information see Managing FinancialForce Accounting App visibility.
Navigating using Salesforce Classic
Navigating Around the Application
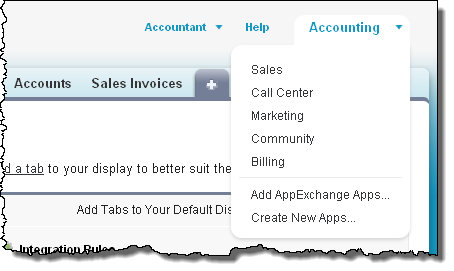
There are two methods of finding your way around a Accounting application:
- Tabs
- Launchpads
Using Tabs
When you first log in to a FinancialForce application, you will see the tabs that are set for your profile. If the tab that you need is not displayed, click the right-most tab to view all tabs available to you. This may be displayed as a plus sign or a right arrow depending in your org settings.
Using the All Tabs page, you can:
- Click any of the tab names to quickly jump to that tab.
- Click Customize My Tabs to add tabs to your default display.
Using Launchpads
Launchpads are an alternative, process-led method of finding the right place to begin your task. See What are Launchpads? for more information.
The Sidebar
The sidebar column that appears on the left side of most Accounting pages provides convenient access to useful links and commands, including:
- The Company Indicator (Home page only)
- The Create New drop-down list
- Custom Links, including a link to this Help (Home Page only)
- The Recent Items list
- A shortcut to the Recycle Bin
- Messages and Alerts (Home page only)
The options in your sidebar may vary if your administrator has customized your home page layout. See the Salesforce Help for more information.
If your administrator has enabled the collapsible sidebar (by clicking Setup | Customize | User Interface | Enable Collapsible Sidebar) you can expand and collapse the sidebar. When collapsed, your work area in the browser window is maximized. Click the edge of the sidebar or press ALT+S to expand or collapse the sidebar as required.