 SECTIONS
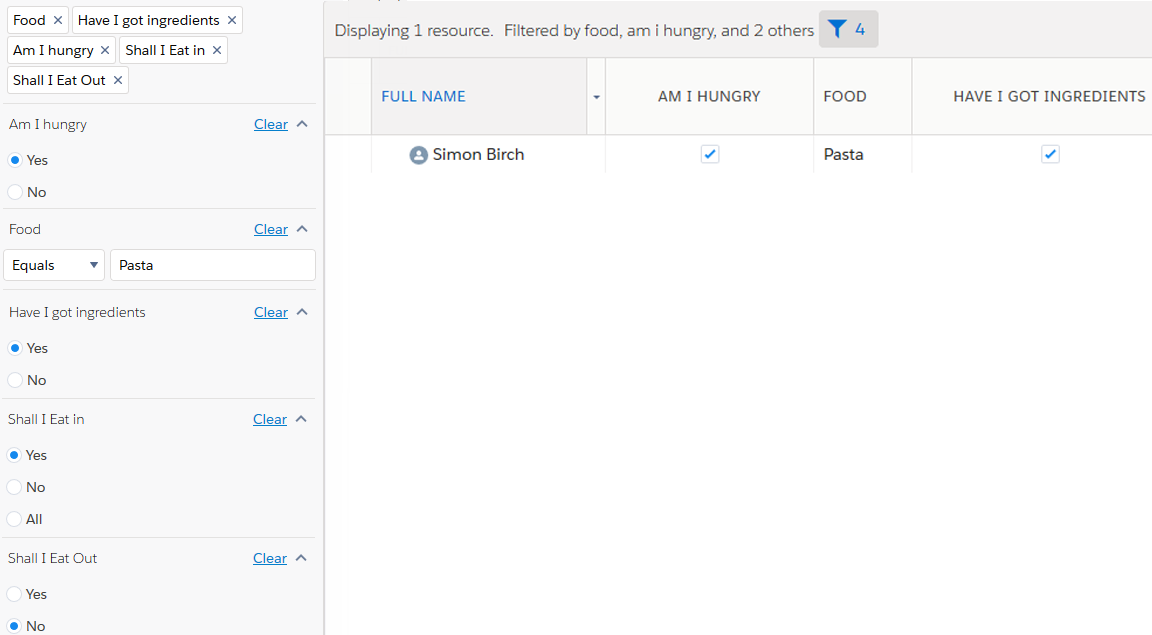
You can create custom columns and filters and use them to filter in the planners. To do this, create custom fields and a field set, add the fields to your field set, and adjust some custom settings.
Customizing the Resource Planner
To customize the Resource Planner:
- Click Setup and then locate the Contact object.
- Click Custom Fields & Relationships on the Contact object.
- Click New on Custom Fields & Relationships.
- Create and save custom fields as described in "Create Custom Fields" in the Salesforce Help.
- Do the following on the Contact object as described in "Creating and Editing Field Sets" in the Salesforce Help:
- Create a new field set on the Contact object, for example, My Custom Resource Planner Field Set.
- [Optional] Copy the value of the field set name field to paste later. For example, My_Custom_Resource_Planner_Field_Set.
- Add the custom fields you created earlier to your new custom field set.
- Click Save.
- Click Setup | Develop | Custom Settings.
- Locate the Planners - Resource custom setting and click Manage next to it.
- Click Edit on the Planners - Resource custom setting.
- Enter the API name of the field set you created earlier, for example, My_Custom_Resource_Planner_Field_Set, in the following fields:
- [Optional] Select Save Column Preferences if you want to change the order and width of columns in Resource Planner.
- Click Save.
- Navigate to the Resource Planner and use the new custom filters and columns you created as additional search criteria.
Customizing the Project Planner
To customize the Project Planner:
- Click Setup and then locate the Project object.
- Click Custom Fields & Relationships on the Project object.
- Click New on Custom Fields & Relationships.
- Create and save custom fields as described in "Create Custom Fields" in the Salesforce Help.
- Do the following on the Project object as described in "Creating and Editing Field Sets" in the Salesforce Help:
- Create a new field set on the Project object, for example, My Custom Project Planner Field Set.
- [Optional] Copy the value of the field set name field to paste later. For example, My_Custom_Project_Planner_Field_Set.
- Add the custom fields you created earlier to your new custom field set.
- Click Save.
- Click Setup | Develop | Custom Settings.
- Locate the Planners - Project custom setting and click Manage next to it.
- Click Edit on the Planners - Resource custom setting.
- Enter the API name of the field set you created earlier, for example, My_Custom_Project_Planner_Field_Set, in the following fields:
- [Optional] Select Save Column Preferences if you want to change the order and width of columns in Project Planner.
- Click Save.
- Navigate to the Project Planner and use the new custom filters and columns you created as additional search criteria.